
Nexplanon
Medically reviewed by A Ras MD.
What is Nexplanon?
Nexplanon is a hormone-releasing birth control implant for use by women to prevent pregnancy for up to 3 years. The implant is a flexible plastic rod about the size of a matchstick that contains a progestin hormone called etonogestrel. It contains a small amount of barium sulfate so that the implant can be seen by X-ray, and may also contain magnesium stearate. Your healthcare provider will insert the implant just under the skin of the inner side of your upper arm. You can use a single Nexplanon implant for up to 3 years. Nexplanon does not contain estrogen.
Description
NEXPLANON is a radiopaque, progestin-only, soft, flexible implant preloaded in a sterile, disposable applicator for subdermal use. The implant is white/off-white, non-biodegradable and 4 cm in length with a diameter of 2 mm (see FIGURE 19). Each implant consists of an ethylene vinyl acetate (EVA) copolymer (28% vinyl acetate, 43 mg) core, containing 68 mg of the synthetic progestin etonogestrel, barium sulfate ((15 mg), radiopaque ingredient), and magnesium stearate (0.1 mg), surrounded by an EVA copolymer skin. Once inserted subdermally, the release rate is 60-70 mcg/day in week 5-6 and decreases to approximately 35-45 mcg/day at the end of the first year, to approximately 30-40 mcg/day at the end of the second year, and then to approximately 25-30 mcg/day at the end of the third year. NEXPLANON is a progestin-only contraceptive and does not contain estrogen. NEXPLANON does not contain latex.
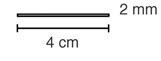 |
| Figure 19 (Not to scale) |
Etonogestrel [13-Ethyl-17-hydroxy-11-methylene-18,19-dinor-17α-pregn-4-en-20-yn-3-one], structurally derived from 19-nortestosterone, is the synthetic biologically active metabolite of the synthetic progestin desogestrel. It has a molecular weight of 324.46 and the following structural formula (FIGURE 20).
 |
| Figure 20 |
Mechanism of Action
The contraceptive effect of NEXPLANON is achieved by suppression of ovulation, increased viscosity of the cervical mucus, and alterations in the endometrium.
What if I need birth control for more than 3 years?
The Nexplanon implant must be removed after 3 years. Your healthcare provider can insert a new implant under your skin after taking out the old one if you choose to continue using Nexplanon for birth control.
What if I change my mind about birth control and want to stop using Nexplanon before 3 years?
Your healthcare provider can remove the implant at any time. You may become pregnant as early as the first week after removal of the implant. If you do not want to get pregnant after your healthcare provider removes the Nexplanon implant, you should start another birth control method right away.
How does Nexplanon work?
Nexplanon prevents pregnancy in several ways. The most important way is by stopping the release of an egg from your ovary. Nexplanon also thickens the mucus in your cervix and this change may keep sperm from reaching the egg. Nexplanon also changes the lining of your uterus.
How well does Nexplanon work?
When the Nexplanon implant is placed correctly, your chance of getting pregnant is very low (less than 1 pregnancy per 100 women who use Nexplanon for 1 year). It is not known if Nexplanon is as effective in very overweight women because studies did not include many overweight women.
The following chart shows the chance of getting pregnant for women who use different methods of birth control. Each box on the chart contains a list of birth control methods that are similar in effectiveness. The most effective methods are at the top of the chart. The box on the bottom of the chart shows the chance of getting pregnant for women who do not use birth control and are trying to get pregnant.

Who should not use Nexplanon?
Do not use Nexplanon if you:
- Are pregnant or think you may be pregnant
- Have, or have had blood clots, such as blood clots in your legs (deep venous thrombosis), lungs (pulmonary embolism), eyes (total or partial blindness), heart (heart attack), or brain (stroke)
- Have liver disease or a liver tumor
- Have unexplained vaginal bleeding
- Have breast cancer or any other cancer that is sensitive to progestin (a female hormone), now or in the past
- Are allergic to anything in Nexplanon
Tell your healthcare provider if you have or have had any of the conditions listed above. Your healthcare provider can suggest a different method of birth control.
What should I tell my healthcare provider about before using Nexplanon?
Talk to your healthcare provider about using Nexplanon if you:
- Have diabetes
- Have high cholesterol or triglycerides
- Have headaches
- Have gallbladder or kidney problems
- Have a history of depressed mood
- Have high blood pressure
- Have an allergy to numbing medicines (anesthetics) or medicines used to clean your skin (antiseptics). These medicines will be used when the implant is placed into or removed from your arm.
Tell your healthcare provider about all the medicines you take, including prescription and nonprescription medicines, vitamins and herbal supplements.
Certain medicines may make Nexplanon less effective, including:
- aprepitant
- barbiturates
- bosentan
- carbamazepine
- felbamate
- griseofulvin
- oxcarbazepine
- phenytoin
- rifampin
- St. John’s wort
- topiramate
- HIV medicines
- Hepatitis C Virus medicines
Ask your healthcare provider if you are not sure if your medicine is one listed above.
If you are taking medicines or herbal products that might make Nexplanon less effective, you and your doctor may decide to leave Nexplanon in place; in that case, an additional non-hormonal contraceptive should be used. Because the effect of another medicine on Nexplanon may last up to 28 days after stopping the medicine, it is necessary to use the additional non-hormonal contraceptive for that long.
When you are using Nexplanon, tell all of your healthcare providers that you have Nexplanon in place in your arm.
How is the Nexplanon implant placed and removed?
Insertion Procedure
Step 1. Have the woman lie on her back on the examination table with her non-dominant arm flexed at the elbow and externally rotated so that her wrist is parallel to her ear or her hand is positioned next to her head (Figure 1).
Figure 1
 |
Step 2. Identify the insertion site, which is at the inner side of the non-dominant upper arm about 8-10 cm (3-4 inches) above the medial epicondyle of the humerus, avoiding the sulcus (groove) between the biceps and triceps muscles and the large blood vessels and nerves that lie there in the neurovascular bundle deeper in the subcutaneous tissue (Figure 2).
Step 3. Make two marks with a sterile marker: first, mark the spot where the etonogestrel implant will be inserted, and second, mark a spot a few centimeters proximal to the first mark (Figure 2). This second mark will later serve as a direction guide during insertion.
Figure 2
 |
Step 4. Clean the insertion site with an antiseptic solution.
Step 5. Anesthetize the insertion area (for example, with anesthetic spray or by injecting 2 mL of 1% lidocaine just under the skin along the planned insertion tunnel).
Step 6. Remove the sterile preloaded disposable NEXPLANON applicator carrying the implant from its blister. The applicator should not be used if sterility is in question.
Step 7. Hold the applicator just above the needle at the textured surface area. Remove the transparent protection cap by sliding it horizontally in the direction of the arrow away from the needle (Figure 3). If the cap does not come off easily, the applicator should not be used. You can see the white colored implant by looking into the tip of the needle. Do not touch the purple slider until you have fully inserted the needle subdermally, as it will retract the needle and prematurely release the implant from the applicator.
Figure 3
 |
Step 8. With your free hand, stretch the skin around the insertion site with thumb and index finger (Figure 4).
Figure 4
 |
Step 9. Puncture the skin with the tip of the needle slightly angled less than 30° (Figure 5).
Figure 5
 |
Step 10. Lower the applicator to a horizontal position. While lifting the skin with the tip of the needle (Figure 6), slide the needle to its full length. You may feel slight resistance but do not exert excessive force. If the needle is not inserted to its full length, the implant will not be inserted properly.
You can best see movement of the needle, and that it is inserted just under the skin, if you are seated and are looking at the applicator from the side and NOT from above. In this position, you can clearly see the insertion site and the movement of the needle just under the skin.
Figure 6
 |
Step 11. Keep the applicator in the same position with the needle inserted to its full length. If needed, you may use your free hand to keep the applicator in the same position during the following procedure. Unlock the purple slider by pushing it slightly down. Move the slider fully back until it stops (Figure 7). The implant is now in its final subdermal position, and the needle is locked inside the body of the applicator. The applicator can now be removed. If the applicator is not kept in the same position during this procedure or if the purple slider is not completely moved to the back, the implant will not be inserted properly.
Figure 7
 |
Step 12. Always verify the presence of the implant in the woman’s arm immediately after insertion by palpation. By palpating both ends of the implant, you should be able to confirm the presence of the 4 cm rod (Figure 8). See “If the rod is not palpable” below.
Figure 8
 |
Step 13. Place a small adhesive bandage over the insertion site. Request that the woman palpate the implant.
Step 14. Apply a pressure bandage with sterile gauze to minimize bruising. The woman may remove the pressure bandage in 24 hours and the small bandage over the insertion site after 3 to 5 days.
Step 15. Complete the USER CARD and give it to the woman to keep. Also, complete the PATIENT CHART LABEL and affix it to the woman’s medical record.
Step 16. The applicator is for single use only and should be disposed in accordance with the Center for Disease Control and Prevention guidelines for handling of hazardous waste.
If the rod is not palpable:
If you cannot feel the implant or are in doubt of its presence, the implant may not have been inserted or it may have been inserted deeply:
- Check the applicator. The needle should be fully retracted and only the purple tip of the obturator should be visible.
- Use other methods to confirm the presence of the implant. Given the radiopaque nature of the implant, suitable methods for localization are two-dimensional X-ray and X-ray computerized tomography (CT scan). Ultrasound scanning (USS) with a high-frequency linear array transducer (10 MHz or greater) or magnetic resonance imaging (MRI) may be used. If these methods fail, call 1-877-467-5266 for information on the procedure for measuring etonogestrel blood levels.
Until the presence of the implant has been verified, the woman should be advised to use a non-hormonal contraceptive method, such as condoms.
Removal Of NEXPLANON
Preparation
Before initiating the removal procedure, the healthcare provider should carefully read the instructions for removal and consult the USER CARD and/or the PATIENT CHART LABEL for the location of the implant. The exact location of the implant in the arm should be verified by palpation.
Procedure For Removal Of An Implant That Is Palpable
Before removal of the implant, the healthcare provider should confirm that:
- The woman does not have allergies to the antiseptic or anesthetic to be used.
Remove the implant under aseptic conditions.
The following equipment is needed for removal of the implant:
- An examination table for the woman to lie on
- Sterile surgical drapes, sterile gloves, antiseptic solution, sterile marker (optional)
- Local anesthetic, needles, and syringe
- Sterile scalpel, forceps (straight and curved mosquito)
- Skin closure, sterile gauze, adhesive bandage and pressure bandages
Removal Procedure
Step 1. Clean the site where the incision will be made and apply an antiseptic. Locate the implant by palpation and mark the distal end (end closest to the elbow), for example, with a sterile marker (Figure 9).
Figure 9
 |
Step 2. Anesthetize the arm, for example, with 0.5 to 1 mL 1% lidocaine at the marked site where the incision will be made (Figure 10). Be sure to inject the local anesthetic under the implant to keep it close to the skin surface.
Figure 10
 |
Step 3. Push down the proximal end of the implant (Figure 11) to stabilize it; a bulge may appear indicating the distal end of the implant. Starting at the distal tip of the implant, make a longitudinal incision of 2 mm towards the elbow.
Figure 11
 |
Step 4. Gently push the implant towards the incision until the tip is visible. Grasp the implant with forceps (preferably curved mosquito forceps) and gently remove the implant (Figure 12).
Figure 12
 |
Step 5. If the implant is encapsulated, make an incision into the tissue sheath and then remove the implant with the forceps (Figures 13 and 14).
Figure 13 and Figure 14
 |
Step 6. If the tip of the implant does not become visible in the incision, gently insert a forceps into the incision (Figure 15). Flip the forceps over into your other hand (Figure 16).
Figure 15 and Figure 16
 |
Step 7. With a second pair of forceps carefully dissect the tissue around the implant and grasp the implant (Figure 17). The implant can then be removed.
Figure 17
 |
Step 8. Confirm that the entire implant, which is 4 cm long, has been removed by measuring its length. There have been reports of broken implants while in the patient’s arm. In some cases, difficult removal of the broken implant has been reported. If a partial implant (less than 4 cm) is removed, the remaining piece should be removed by following the instructions in section 2.3. [See Removal of NEXPLANON.] If the woman would like to continue using NEXPLANON, a new implant may be inserted immediately after the old implant is removed using the same incision [see Replacing of NEXPLANON].
Step 9. After removing the implant, close the incision with a steri-strip and apply an adhesive bandage.
Step 10. Apply a pressure bandage with sterile gauze to minimize bruising. The woman may remove the pressure bandage in 24 hours and the small bandage in 3 to 5 days.
When should I call my healthcare provider?
Call your healthcare provider right away if you have:
- Pain in your lower leg that does not go away
- Severe chest pain or heaviness in the chest
- Sudden shortness of breath, sharp chest pain, or coughing blood
- Symptoms of a severe allergic reaction, such as swollen face, tongue or throat; trouble breathing or swallowing
- Sudden severe headache unlike your usual headaches
- Weakness or numbness in your arm, leg, or trouble speaking
- Sudden partial or complete blindness
- Yellowing of your skin or whites of your eyes, especially with fever, tiredness, loss of appetite, dark colored urine, or light-colored bowel movements
- Severe pain, swelling, or tenderness in the lower stomach (abdomen)
- Lump in your breast
- Problems sleeping, lack of energy, tiredness, or you feel very sad
- Heavy menstrual bleeding
What if I become pregnant while using Nexplanon?
You should see your healthcare provider right away if you think that you may be pregnant. It is important to remove the implant and make sure that the pregnancy is not ectopic (occurring outside the womb). Based on experience with other hormonal contraceptives, Nexplanon is not likely to cause birth defects.
Can I use Nexplanon when I am breastfeeding?
If you are breastfeeding your child, you may use Nexplanon if 4 weeks have passed since you had your baby. A small amount of the hormone contained in Nexplanon passes into your breast milk. The health of breast-fed children whose mothers were using the implant has been studied up to 3 years of age in a small number of children. No effects on the growth and development of the children were seen. If you are breastfeeding and want to use Nexplanon, talk with your healthcare provider for more information.
What are the possible side effects of Nexplanon?
The most common side effects of Nexplanon include:
- Changes in Menstrual Bleeding Patterns (menstrual periods). The most common side effect of Nexplanon is a change in your normal menstrual bleeding pattern. In studies, one out of ten women stopped using the implant because of an unfavorable change in their bleeding pattern. You may experience longer or shorter bleeding during your periods or have no bleeding at all. The time between periods may vary, and in between periods you may also have spotting. Tell your healthcare provider right away if:
- You think you may be pregnant
- Your menstrual bleeding is heavy and prolonged
Besides changes in menstrual bleeding patterns, other frequent side effects that caused women to stop using the implant include:
- Mood swings
- Weight gain
- Headache
- Acne
- Depressed mood
Other common side effects include:
- Headache
- Vaginitis (inflammation of the vagina)
- Weight gain
- Acne
- Breast pain
- Viral infections such as sore throats or flu-like symptoms
- Stomach pain
- Painful periods
- Mood swings, nervousness, or depressed mood
- Back pain
- Nausea
- Dizziness
- Pain
- Pain at the site of insertion
Implants have been reported to be found in a blood vessel, including a blood vessel in the lung which can be associated with shortness of breath, cough and/or the coughing up of blood or blood-stained mucus.
This is not a complete list of possible side effects. For more information, ask your healthcare provider for advice about any side effects that concern you. You may report side effects to the FDA at 1-800- FDA-1088.
What are the possible risks of using Nexplanon?
1. Problems with insertion and removal
The implant may not be placed in your arm at all due to a failed insertion. If this happens, you may become pregnant. Immediately after insertion, and with help from your healthcare provider, you should be able to feel the implant under your skin. If you can’t feel the implant, tell your healthcare provider.
Location and removal of the implant may be difficult or impossible because the implant is not where it should be. Special procedures, including surgery in the hospital, may be needed to remove the implant. If the implant is not removed, then the effects of Nexplanon will continue for a longer period of time.
Implants have been found in the pulmonary artery (a blood vessel in the lung). If the implant cannot be found in the arm, your healthcare professional may use x-rays or other imaging methods on the chest. If the implant is located in the chest, surgery may be needed.
Other problems related to insertion and removal are:
- Pain, irritation, swelling, or bruising at the insertion site
- Scarring, including a thick scar called a keloid around the insertion site
- Infection
- Scar tissue may form around the implant making it difficult to remove
- The implant may come out by itself. You may become pregnant if the implant comes out by itself. Use a back-up birth control method and call your healthcare provider right away if the implant comes out.
- The need for surgery in the hospital to remove the implant
- Injury to nerves or blood vessels in your arm
- The implant breaks making removal difficult
2. Ectopic Pregnancy
If you become pregnant while using Nexplanon, you have a slightly higher chance that the pregnancy will be ectopic (occurring outside the womb) than do women who do not use birth control. Unusual vaginal bleeding or lower stomach (abdominal) pain may be a sign of ectopic pregnancy. Ectopic pregnancy is a medical emergency that often requires surgery. Ectopic pregnancies can cause serious internal bleeding, infertility, and even death. Call your healthcare provider right away if you think you are pregnant or have unexplained lower stomach (abdominal) pain.
3. Ovarian Cysts
Cysts may develop on the ovaries and usually go away without treatment but sometimes surgery is needed to remove them.
4. Breast Cancer
It is not known whether Nexplanon use changes a woman’s risk for breast cancer. If you have breast cancer now, or have had it in the past, do not use Nexplanon because some breast cancers are sensitive to hormones.
5. Serious Blood Clots
Nexplanon may increase your chance of serious blood clots, especially if you have other risk factors such as smoking. It is possible to die from a problem caused by a blood clot, such as a heart attack or a stroke.
Some examples of serious blood clots are blood clots in the:
- Legs (deep vein thrombosis)
- Lungs (pulmonary embolism)
- Brain (stroke)
- Heart (heart attack)
- Eyes (total or partial blindness)
The risk of serious blood clots is increased in women who smoke. If you smoke and want to use Nexplanon, you should quit. Your healthcare provider may be able to help.
Tell your healthcare provider at least 4 weeks before if you are going to have surgery or will need to be on bed rest. You have an increased chance of getting blood clots during surgery or bed rest.
6. Other Risks
A few women who use birth control that contains hormones may get:
- High blood pressure
- Gallbladder problems
- Rare cancerous or noncancerous liver tumors
7. Broken or Bent Implant
If you feel that the implant may have broken or bent while in your arm, contact your healthcare provider.
General information about the safe and effective use of Nexplanon
This Patient Information leaflet contains important information about Nexplanon. If you would like more information, talk with your healthcare provider. You can ask your healthcare provider for information about Nexplanon that is written for healthcare professionals. You may also call 1-800-622-4477 or visit www.NEXPLANON-USA.com.
How should I store Nexplanon?
Store at 25ºC (77ºF); excursions permitted to 15- 30ºC (59-86ºF).
Avoid storing Nexplanon at temperatures above 30ºC (86ºF).
Keep out of sight and reach of children.
What are the ingredients in Nexplanon?
Active ingredient: etonogestrel
Inactive ingredients: barium sulfate, magnesium stearate, ethylene-vinyl acetate copolymer, ethylene-vinyl acetate copolymer.
Label
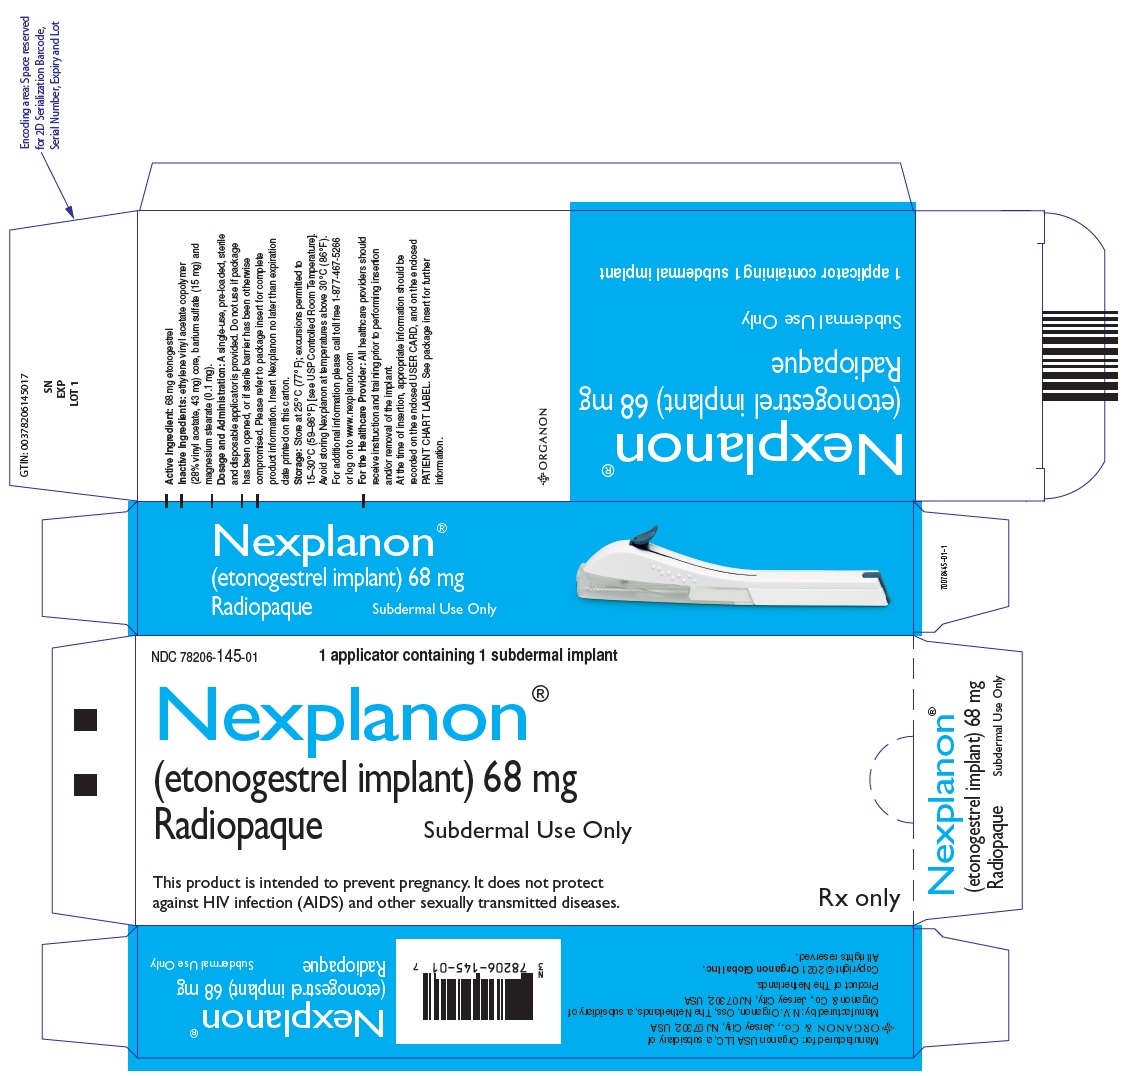
PRINCIPAL DISPLAY PANEL – 68 MG IMPLANT BLISTER PACK CARTON
- NDC 78206-145-01
1 applicator containing 1 subdermal implant - Nexplanon®
(etonogestrel implant) 68 mg
Radiopaque
Subdermal Use Only - This product is intended to prevent pregnancy. It does not protect
against HIV infection (AIDS) and other sexually transmitted diseases.
Rx only
SRC: NLM .